
Introduction
One Daily feature that we were really excited to introduce recently is virtual backgrounds. With virtual backgrounds, participants can get a little more privacy by hiding their room in favor of another image.
Our Daily Prebuilt offering already comes with a few pre-selected virtual backgrounds for users to choose from. But both Daily Prebuilt and our custom call object also allow utilizing custom background images for virtual backgrounds.
In this post, we'll go through how to add a feature to set custom virtual backgrounds in our Daily Prebuilt Electron demo. If you're curious to learn more about the basics of working with Daily in Electron, check out our Electron guide.
Getting started
First, create a free Daily account and a room. The room settings don't matter — our demo will work with anything!
Next, clone the virtual backgrounds demo and check out the relevant branch:
git clone git@github.com:daily-demos/electron-prebuilt.git
cd electron-prebuilt
git checkout v1.0
In renderer/daily.js, replace the placeholder room URL with that of the room you just created.
Finally, install relevant dependencies and run the app:
npm i && npm run start
What are we building?
We are building a small Electron demo app using Daily Prebuilt and adding a feature allowing call participants to set custom virtual backgrounds. We'll be using Daily's updateInputSettings() API method to apply the user's chosen background to the video call.
When our custom background images are first loaded, the background selection window will open automatically for the first time. After that, the user is able to access custom virtual backgrounds in their application menu bar. Windows and OS X treat their top level menus a little differently, so let's go through how this will look in both operating systems.
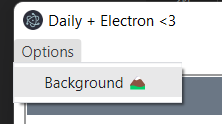
On Windows, the user will access their background options via the "Options -> Background" menu item:
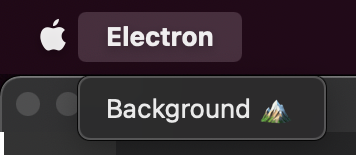
On OS X, the user will access their background options via the "Electron -> Background" menu item:
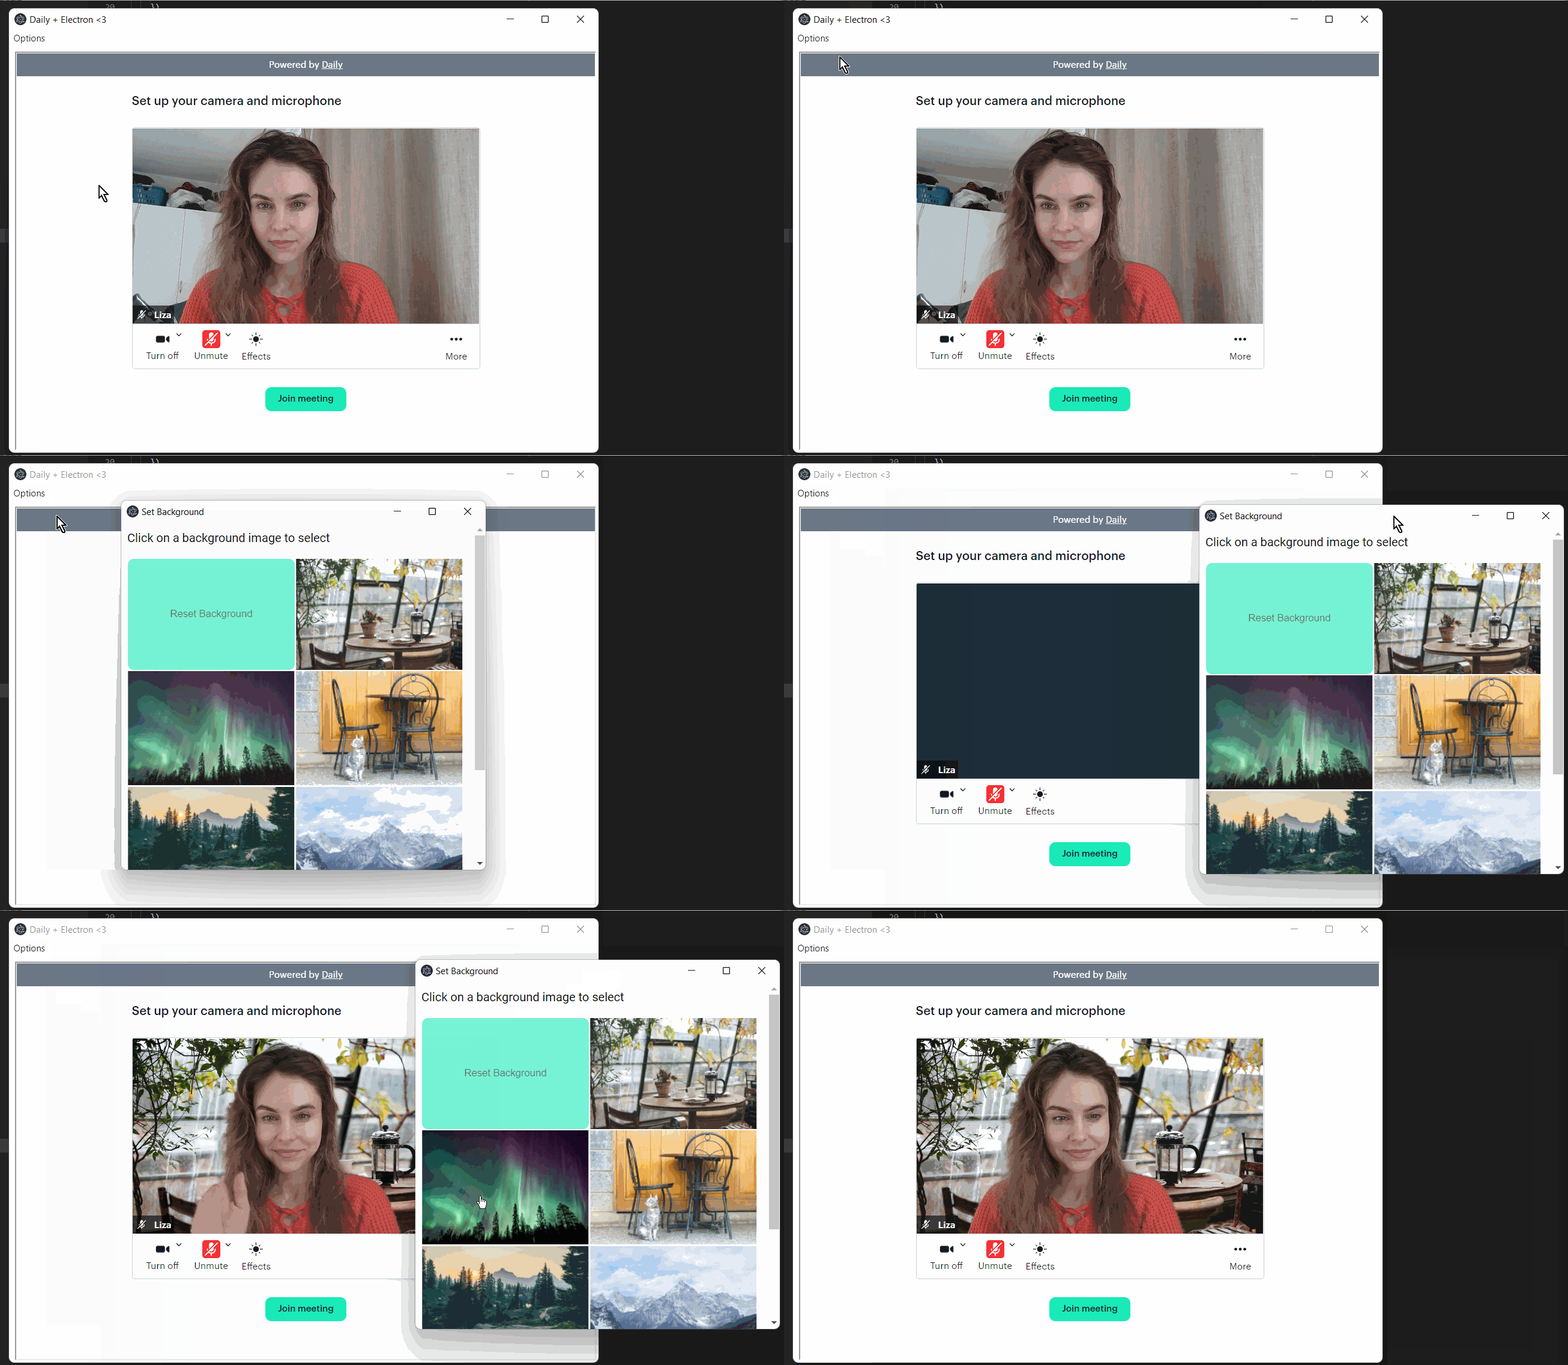
Clicking on a background image sets the chosen background for the local participant:
To add a new background image to the list of selectable backgrounds, all you need to do is drop the image file into the backgrounds directory in the demo repository.
Application structure
Our Electron application will have two renderer processes: one for the main call window, and another for the background selection window. They communicate with each other through Electron's contextBridge. Here is what our process structure looks like for this demo:

Setting up the main process
Once Electron has finished initializing, we're ready to start our application setup:
app.whenReady().then(() => {
  // Register a custom protocol to fetch our background images
  protocol.registerFileProtocol("bg", (request, callback) => {
    const url = request.url;
    // Strip the scheme from the path
    const path = request.url.substring(5, url.length);
    callback({ path: path });
  });
  createMenu();
  createCallWindow();
  loadBackgroundFiles();
});
Above, we first register a custom protocol for our background images. Creating this new protocol allows us to use local image files as our backgrounds without having to disable Electron's web security (we'll talk more about this later in the post).
Next, we create our application menu and call window. Finally, we load our background files. Let's go through these steps in more detail.
Creating the menu
createMenu() creates an application menu with a single menu item:
// createMenu creates our application menu with the background setting option.
function createMenu() {
  const template = [
    {
      label: "Options",
      submenu: [
        {
          id: "background",
          label: "Background 🏔️",
          enabled: false,
          click: async () => {
            createBackgroundSelectionWindow();
          },
        },
      ],
    },
  ];
  const menu = Menu.buildFromTemplate(template);
  backgroundMenuButton = menu.getMenuItemById("background");
  Menu.setApplicationMenu(menu);
}
In createMenu(), we start by defining a structural template for our menu. We then have Electron build the actual menu from it.
Note that our new menu item is disabled by default. We don't want to allow the user to try to change their background too soon. Before our background feature is ready to use, two conditions need to be met:
- Background image files need to be loaded and ready to use
- The Daily call object needs to be done with some initial setup steps to accept background updates. Specifically, we need to ensure that we've received the
"started-camera"event from Daily before we can use virtual backgrounds.
Therefore, we start with this menu item disabled.
Creating the call window
createCallWindow() creates the first of two renderer processes we'll use in our application:
// createCallWindow creates the main application window in which
// the Daily call will be loaded.
function createCallWindow() {
  callWindow = new BrowserWindow({
    width: 800,
    height: 600,
    webPreferences: {
      preload: path.join(__dirname, "preloadCall.js"),
    },
  });

  // If the user closes the main call window, exit
  // the entire application even if the background
  // options window is still open.
  callWindow.on("close", () => {
    callWindow = null;
    app.quit();
  });

  callWindow.loadFile(path.join(__dirname, "../html", "index.html"));
}
Above, we instantiate a BrowserWindow and specify a preload script (preloadCall.js). We also set up a "close" event handler. This handler will ensure that the entire application is shut down when the call window is closed, even if the background selection window is open.
Finally, we load our index.html file, to set up the call window DOM.
Loading our background images
loadBackgroundFiles() traverses all image files in our backgrounds directory and adds their paths to an array of background files:
// loadBackgroundFiles loads all jpg, jpeg, or png files in
// the backgrounds file directory. This means to add a new
// background, all the user has to do is drop the image into
// the "backgrounds" folder, without any code changes.
async function loadBackgroundFiles() {
  const dirPath = path.join(__dirname, "../backgrounds");
  fs.readdir(dirPath, function (err, files) {
    if (err) {
      console.error("failed to load background files", err);
      return;
    }
    files.forEach((file) => {
      const ext = path.extname(file);
      if (ext !== ".png" && ext !== ".jpg" && ext !== ".jpeg") {
        return;
      }

      const imgPath = path.join(dirPath, file);
      backgroundFiles.push(imgPath);
    });
  });

  backgroundsLoaded = true;
  tryEnableBackgroundSet();
}
At the end, we set a top level backgroundsLoaded boolean to true to indicate that we're done with this prerequisite to enable backgrounds. We then try to enable the user to set their backgrounds via tryEnableBackgroundSet():
function tryEnableBackgroundSet() {
  if (backgroundsLoaded && callObjectReady) {
    createBackgroundSelectionWindow();
  }
In the small function above, we check our two main conditions for enabling the background feature: whether the backgrounds are loaded, and whether the Daily call object is ready. If both of these are true, we create our background selection window for the first time.
We went over how we load the background images earlier, but how do we meet the second condition of call object readiness? To answer this question, we'll dive into our call window renderer process and how we set up our Daily call.

Setting up our Daily call in the call window renderer process
Our call window and its preload script go hand in hand, so let's go through both here.
Call window preload
In our preloadCall.js file, we set up two listeners for events coming from the main process. We've left comments on what each of these does inline:
// This listener will allow us to handle attempts to set
// the given virtual backround
ipcRenderer.on("set-background", (e, arg) => {
  const event = new CustomEvent("set-background", {
    detail: {
      imgPath: arg.imgPath,
    },
  });
  window.dispatchEvent(event);
});

// This listener will facilitate removing any custom background
// from the local participant.
ipcRenderer.on("reset-background", (e, arg) => {
  window.dispatchEvent(new Event("reset-background"));
});
Each of these listeners dispatch a new event to the call window renderer process: one to set a new background and one to reset any background that the user may have set.
Next, we expose a single function via the context bridge. The renderer process will be able to call this function on demand:
// Functions which will be exposed to the call window
// renderer process
contextBridge.exposeInMainWorld("api", {
  tryEnableBackgrounds: () => {
    ipcRenderer.invoke("try-enable-backgrounds");
  },
});
The tryEnableBackgrounds() function defined above is called when the Daily call object is fully set up and ready to receive background updates.
Call window renderer process
The index.html file we loaded after instantiating the call BrowserWindow above imports two scripts:
<script crossorigin src="https://unpkg.com/@daily-co/daily-js"></script>
<script src="../renderer/daily.js"></script>
The first is daily-js, and the second is a local daily.js file which will be in charge of all of our Daily call operations.
Creating the call frame and joining the call
In daily.js, we instantiate our Daily Prebuilt call frame and join the call as soon as the DOM is ready. This is relevant not just in the context of Electron: a vanilla browser-based JavaScript application could use the same approach to join a Daily Prebuilt call.
window.addEventListener("DOMContentLoaded", () => {
  initCall();
});

function initCall() {
  const container = document.getElementById("container");

  callFrame = DailyIframe.createFrame(container, {
    showLeaveButton: true,
    iframeStyle: {
      position: "fixed",
      width: "calc(100% - 1rem)",
      height: "calc(100% - 1rem)",
    },
  })
    .on("nonfatal-error", (e) => {
      console.warn("nonfatal error:" e);
    })
    .on("started-camera", () => {
      api.tryEnableBackgrounds();
    })
    .on("left-meeting", () => {
      initCall();
    });

  // TODO: Replace the following URL with your own room URL.
  callFrame.join({ url: "https://<your-domain>.daily.co/<room-name>" });
}
When initializing a call, we create a call frame using the createFrame() static method. The "frame" which is returned is an instance of the Daily call object and therefore has access to all the same events and instance methods.
We then register three listeners for Daily events: "nonfatal-error", "started-camera", and "left-meeting".
Finally, we call the join() instance method and pass in a hard-coded meeting URL (you can change this to your own Daily room).
Handling the "started-camera" event in the call window renderer process
The "started-camera" event sent by Daily is the most important one for the purposes of this demo. When Daily emits this event, it means we're ready to start setting virtual backgrounds. We then call the tryEnableBackgrounds() method we defined in the preload, which in turn sends a "try-enable-backgrounds" event back to the main process:
// "try-enable-backgrounds" event handler will mark the call object
// as ready to accept background effects, and attempts to enable
// the background setting option menu.
ipcMain.handle("try-enable-backgrounds", () => {
  callObjectReady = true;
  tryEnableBackgroundSet();
});
As we can see, the main process handles the event by setting our second prerequisite bool: callObjectReady to true and attempting to enable the background feature via tryEnableBackgroundsSet(). We went over it in brief already, but here it is again with some comments to jog our memory:
// tryEnableBackgroundSet enables the background option menu item
// if all backgrounds have been successfully loaded and the call
// object is ready.
function tryEnableBackgroundSet() {
  if (backgroundsLoaded && callObjectReady) {
    // When first enabling the feature, open the window for
    // the user. After that, the user will use the menu item
    // to change their background.
    createBackgroundSelectionWindow();
  }
}
Finally, this is where the two conditions we discussed earlier converge: if our background files are loaded and our call object is ready, we create the background selection window and open it for the first time.
Creating the background selection window
The background selection window is created by instantiating another Electron BrowserWindow. This marks the creation of our second renderer process:
// createBackgroundSelectionWindow creates a window in which the user
// can select a Daily video call background to set.
function createBackgroundSelectionWindow() {
  backgroundMenuButton.enabled = false;

  const win = new BrowserWindow({
    width: 500,
    height: 500,
    webPreferences: {
      preload: path.join(__dirname, "preloadBackground.js"),
    },
    autoHideMenuBar: true,
  });

  win.loadFile(path.join(__dirname, "../html", "background.html"));

  win.webContents.once("dom-ready", () => {
    win.webContents.send("load-backgrounds", { backgrounds: backgroundFiles });
  });

  // Re-enable the menu button when the background selection window
  // is closed.
  win.on("close", () => {
    backgroundMenuButton.enabled = true;
  });
}
The first thing we do above is disable the background selection menu button, because there's no point allowing the user to try to open another background selection window if an instance of it already exists.
We then create another (smaller) BrowserWindow and give it its own preload script: preloadBackground.js.
Next, we load the relevant HTML file to set up the background selection window's DOM elements. Once the DOM is ready, we send a "load-backgrounds" event to the window, with all of our pre-loaded background file paths included in the payload.
We then create a small "close" event handler for the window, to re-enable the background menu item when the selection window is closed.
Let's take a look at the background selection window and its preload script:
Background selection window preload
Our preloadBackground.js preload script sets up a handler for the "load-backgrounds" event we covered above. The preload handles this event as follows:
// This listener will handle requests to load all background files
// in the background setting window.
ipcRenderer.on("load-backgrounds", (e, arg) => {
  const event = new CustomEvent("load-backgrounds", {
    detail: {
      backgrounds: arg.backgrounds,
    },
  });
  window.dispatchEvent(event);
});
As we can see above, the preload emits a new CustomEvent to the renderer process window. This event instructs the renderer process to load the given background images.
The background selection window preload script also exposes two API functions to the renderer process via Electron's context bridge:
// Functions which will be exposed to the background option
// window renderer process
contextBridge.exposeInMainWorld("api", {
  setBackground: (imgPath) => {
    ipcRenderer.invoke("set-background", imgPath);
  },
  resetBackground: () => {
    ipcRenderer.invoke("reset-background");
  },
});
The above functions can be invoked by the selection window to either set the background to a given image or reset it back to the default.
Next, let's go through how backgrounds are displayed in our background selection window.
Background selection renderer process
The background.html file we load when creating the background selection BrowserWindow above defines a container for our window content. Our background images will be loaded in the "bgImages" element below, next to the existing reset button:
   <div id="container">
      <h1>Click on a background image to select</h1>
      <div id="bgImages">
        <button id="reset">Reset Background</button>
      </div>
    </div>
    <script src="../renderer/background.js"></script>
In the imported background.js script, we listen for the aforementioned "´load-backgrounds" event which will be sent from the preload and handle it as follows:
// Listen for the "load-backgrounds" event sent by the preload,
// and load the given image files for the user to select from.
window.addEventListener("load-backgrounds", (event) => {
  const container = document.getElementById("bgImages");
  const backgrounds = event.detail.backgrounds;
  for (let i = 0; i < backgrounds.length; i++) {
    const img = document.createElement("img");
    const imgPath = backgrounds[i];
    img.src = imgPath;
    img.onclick = () => {
      api.setBackground(imgPath, false);
    };
    container.appendChild(img);
  }
});
When setting up the backgrounds for display, we get our "bgImages" div as well as the background image paths given to us by the event payload. We then iterate through all of the background image paths and create a new "img" element for each. We also define an onclick. This calls out to the API defined in our preload to set the clicked image as the participant's video call background.
Likewise, we define an onclick handler for our background reset button:
window.addEventListener("DOMContentLoaded", () => {
  init();
});

// Initialize relevant handlers
function init() {
  const resetBtn = document.getElementById("reset");
  resetBtn.onclick = () => {
    api.resetBackground();
  };
}
Above, we make a call to resetBackground() (which is also defined in our preload) when the reset background is clicked.
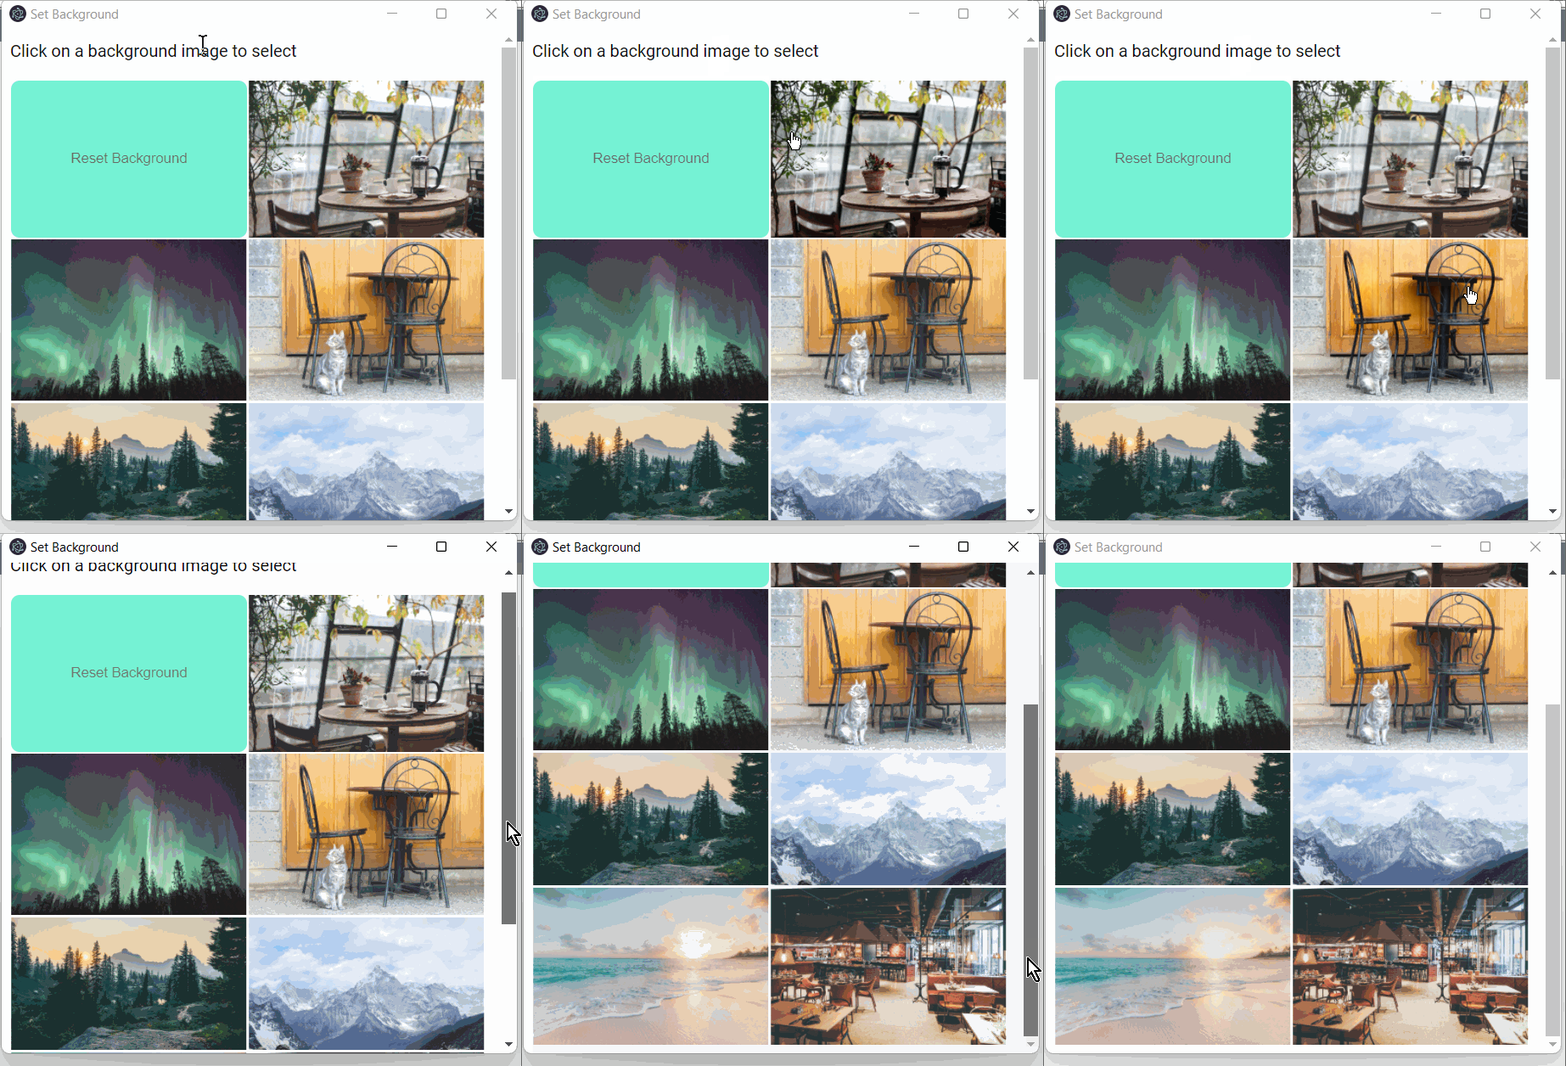
Setting and resetting backgrounds with Daily
The main process handles the "set-background" and "reset-background" events sent to it by the background selection preload script as follows:
// "set-background" event handler instructs the daily renderer
// process to set the given background for the local participant.
ipcMain.handle("set-background", (e, imgPath) => {
  callWindow.webContents.send("set-background", {
    imgPath: imgPath,
  });
});

// "reset-background" event handler instructs the daily renderer
// process to reset any custom backgrounds for the local participant.
ipcMain.handle("reset-background", (e) => {
  callWindow.webContents.send("reset-background");
});
We can see that the main process sends matching set and reset events to the call window preload. This is how our two renderer processes are able to communicate with each other. They don't have direct access to each other, but can pass events back and forth to and from the main process. If this was not an Electron application with two separate renderer processes, you could just make function calls directly to the Daily API to set or reset the background.
We are now in the final stretch: how do we actually set custom backgrounds with Daily?

Using updateInputSettings() to set our virtual background
The call window renderer process listens for our two custom events: "set-background" and "reset-background" and handles them accordingly. First, let's look at "set-background":
window.addEventListener("set-background", (ev) => {
  const data = ev.detail;
  let imgPath = data.imgPath;
  imgPath = "bg://" + imgPath;

  callFrame.updateInputSettings({
    video: {
      processor: {
        type: "background-image",
        config: {
          source: imgPath,
        },
      },
    },
  });
});
First, we update the background image path given to us as part of the event payload to use our previously defined "bg" URI scheme. As an example, our final imgPath will look something like this: bg://C:\dev\daily\demos\electron-daily-prebuilt\backgrounds\northern-lights.jpg
Without using a custom scheme like the one we defined here, the call toupdateInputSettings()will result in the defaultfilescheme being used, followed by the following error:Not allowed to load local resource: file:///C:/dev/daily/demos/electron-daily-prebuilt/backgrounds/northern-lights.jpg. One way to get around this is to disable Electron's web security, but that is generally considered a bad idea. Defining our own privileged URI scheme allows us to load local files without completely disabling web security.
After constructing our new imgPath, we call the updateInputSettings() instance method with the processor type set to "background-image" and our image path specified as the source.
To reset the background back to default (i.e., no background), the "reset-background" handler calls the same updateInputSettings() method with the processor type set to "none":
window.addEventListener("reset-background", (ev) => {
  callFrame.updateInputSettings({
    video: {
      processor: {
        type: "none",
      },
    },
  });
});
And that's it! The user's background has now been set to their chosen custom image and they can pretend to be on a beach instead of in their messy bedroom.

Wrapping up
In this post, we learned how to set up a Daily Prebuilt video call with a custom background feature in an Electron application.
If you're curious to learn more about working with Daily and Electron, you can check out our other Electron integration guide. If you're looking for an example and walkthrough of a more advanced Electron video call app built with Daily, check out our Electron call overlay series

